In the first part, I have covered how to use native modules in Android for TomTom maps. Please take a look if you haven't already:
https://cuneyt.aliustaoglu.biz/en/using-tomtom-maps-in-react-native-with-android/
We want to use the same JavaScript file for both environments.
import React from 'react'
import { View, requireNativeComponent, StyleSheet, Platform } from 'react-native'

// IOS removes the suffix "Manager" from the native module if there is one
const moduleName = Platform.OS === 'ios' ? 'MapView' : 'MapViewManager'

const TomTomMap = requireNativeComponent(moduleName)

class App extends React.Component {
  constructor(props){
    super(props)
  }
  onMapReady = () => {
    alert('MAP READY')
  }

  render () {
    return (
      <>
        <TomTomMap
          onMapReady={this.onMapReady}
          markers={[{ lat: 40.9175, lng: 38.3927, label: 'Giresun' }, { lat: 40.9862, lng: 37.8797, label: 'Ordu' }]}
          mapZoom={7}
          mapCenter={{ lat: 40.9175, lng: 38.3927 }}
          style={StyleSheet.absoluteFillObject}
        />
      </>
    )
  }
}

export default App
Now let's start Xcode and add native modules to use TomTom map with React Native.
Add a "New Group with Folder" and type "NativeModules", so we will separate RN's boilerplate from our code.
Inside NativeModules create a new Objective C file and call it NativeBridge. Also create a new Swift file called "MapViewManager.swift". It will warn you to add a bridging header. Click "Create Bridging Header" and don't change the default name.
Add another swift file called TomTomMap. After creating all the files the folder structure should look like below:
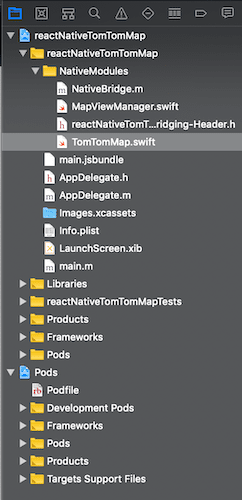
Those files are all empty. Let's implement the same functionality that we've done in Android.
One important thing is that if an IOS native component ends with suffix 'Manager', React Native ignores it. For example our component is called MapViewManager but when we 'require' this component from JavaScript we need to require it as MapView not MapViewManager. But this does not apply to Android for some reason. So I had to add below to JavaScript file.
const moduleName = Platform.OS === 'ios' ? 'MapView' : 'MapViewManager'
const TomTomMap = requireNativeComponent(moduleName)
We will implement this solution in Swift. But to export Swift classes and functions to JavaScript, we need to use Objective-C as the bridge. When Swift and Objective-C files exist together in a project, Xcode creates a file called Bridging-Header. That's why Xcode generated that file automatically after you added a Swift file to the project.
Before we start we need to add TomTom map library. Since version 60, React Native is using CocoaPods by default. Add below to your Podfile:
pod 'TomTomOnlineSDKMaps'
If you want to use all modules you can add the all using below. But for this tutorial we will only use the map not the APIs.
  pod 'TomTomOnlineSDKMaps'
  pod 'TomTomOnlineSDKSearch'
  pod 'TomTomOnlineSDKRouting'
  pod 'TomTomOnlineSDKTraffic'
  pod 'TomTomOnlineSDKMapsUIExtensions'
  pod 'TomTomOnlineSDKMapsStaticImage'
  pod 'TomTomOnlineSDKGeofencing'
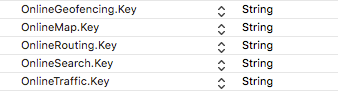
Now edit info.plist file and add your API key. We only need to add OnlineMap.Key for this tutorial.
Now under ./ios folder run pod install to install the dependencies.
We've installed the IOS SDK. So now let's add below to NativeBridge.m file
#import <Foundation/Foundation.h>
#import "React/RCTViewManager.h"

@interface RCT_EXTERN_MODULE(MapViewManager, RCTViewManager)
  RCT_EXPORT_VIEW_PROPERTY(mapZoom, NSNumber)
  RCT_EXPORT_VIEW_PROPERTY(mapCenter, NSDictionary)
  RCT_EXPORT_VIEW_PROPERTY(markers, NSArray)
  RCT_EXPORT_VIEW_PROPERTY(onMapReady, RCTDirectEventBlock)
@end
It may look familiar. Those are the props that we send from JavaScript. ReadableMap in Java becomes NSDictionary and ReadableArray becomes NSArray in ObjectiveC and Swift. We don't implement anything in Objective C. It is just an interface. We will create the implementation in a better looking language called Swift :)
Edit MapViewManager.swift file as below
import Foundation
import TomTomOnlineSDKMaps

@objc(MapViewManager)
class MapViewManager: RCTViewManager {

  override func view() -> TTMapView {
    let ttMap = TomTomMap(frame: CGRect(x:0, y:0, width: 0, height: 0))
    return ttMap
  }
}
Here RCTViewManager is equivalent to the SimpleViewManager in Java. It is also just a wrapper and will pass all the logic into the real map component.
Edit TomTomMap.swift file as below:
import Foundation
import TomTomOnlineSDKMaps

class TomTomMap: TTMapView {

  @objc var mapZoom: NSNumber!
  @objc var mapCenter: NSDictionary = [:]
  @objc var onMapReady: RCTDirectEventBlock?
  @objc var markers: NSArray!

  override init(frame: CGRect) {
    super.init(frame: frame)
  }

  override func didSetProps(_ changedProps: [String]!) {
    let mapView = TTMapView(frame: self.bounds)
    let lat = self.mapCenter.object(forKey: "lat") as! Double
    let lng = self.mapCenter.object(forKey: "lng") as! Double

    let zoom = self.mapZoom as! Double

    for i in 0...self.markers.count-1 {
      let marker = self.markers[i] as! NSDictionary
      let mLat = marker.object(forKey: "lat") as! Double
      let mLng = marker.object(forKey: "lng") as! Double
      let lbl = marker.object(forKey: "label") as! String

      let anno = TTAnnotation(coordinate: CLLocationCoordinate2D( latitude: mLat,longitude: mLng))
      self.annotationManager.add(anno)
    }

    mapView.autoresizingMask = [.flexibleWidth, .flexibleHeight]
    self.center(on: CLLocationCoordinate2D( latitude: lat,longitude: lng), withZoom: zoom )

    self.onMapReady!([:])
  }

  required init(coder aDecoder: NSCoder) {
    fatalError("init(coder:) has not been implemented")
  }


}
First 4 lines of the class are mapped to ObjectiveC file which links it to the JavaScript file as props. @objc decorator is needed when we want to use a Swift variable in ObjectiveC.
@objc var mapZoom: NSNumber!
@objc var mapCenter: NSDictionary = [:]
@objc var onMapReady: RCTDirectEventBlock?
@objc var markers: NSArray!
This decorator creates the setters automatically. So, whenever a prop gets changed, it triggers "didSetProps" function with changedProps parameter with the changed prop names list. This is the parameter you want to check when you want to optimize this function.
As we did in Java, we are setting the zoom, map center and 2 markers. And also triggers onMapReady callback in JavaScript. Now run the project in Xcode and start the simulator.
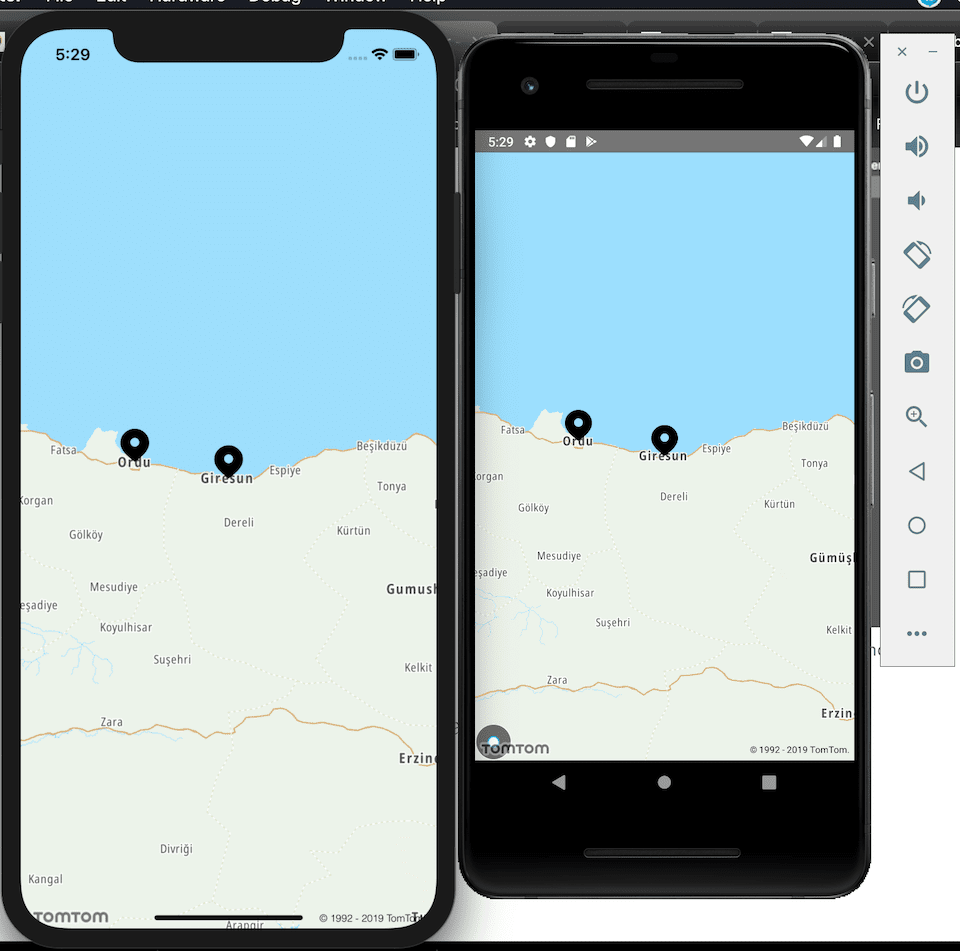
So, you can use this simple project as a starting point and extend it further if you don't want to use Google Maps in React Native.